I recently purchased a few LCD displays from ebay, these were labelled up as Hitachi LM038 LCD Modules. There didn’t seem to be much information out there on the internet about how to use these, so I thought i’d put together a quick how to guide for anyone else who may have purcased one of these. In the example i’m using an Arduino (Atmel ATMega328) for speed and ease of use, however the process would be the same for any micro (PIC or AVR).
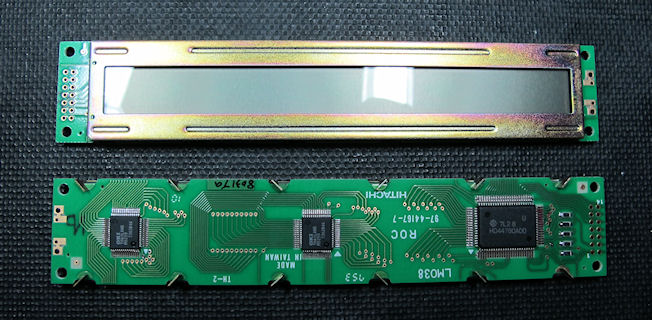
The photo above is of the front and rear of the module
The LM038 LCD uses the HD44780 LCD Controller in the FP-80B package, the datasheet can be found here http://www.sparkfun.com/datasheets/LCD/HD44780.pdf
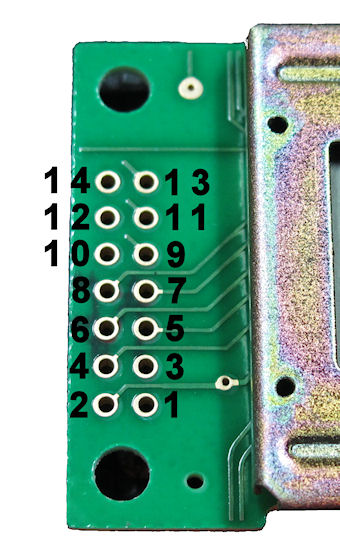
As you can see, there is a 14 pin interface on the left of the module (as seen from the lcd face), below is the pin numbering for these.
The pin mappings between the LCD module and the Arduino should be as follows
As you will notice, LCD pins 7,8,9 & 10 are optional more on this later. Luckily the arduino has a library called LiquidCrystal that is compatible with the HD44780 controller, so we will use this for the example. If you are using a the raw Amtel AVR or PIC microcontroller then you will need to refer to the datasheet for the protocol, or possible inspect the LiquidCrystal arduino library (they are all written in C so they are quite portable, albeit designed for usin on an AVR micro).
Here is the hello world code
#include <LiquidCrystal.h>

/* LiquidCrystal display with:
LCD 4 (RS) to arduino pin 12
LCD 5 (R/W) to arduino pin 6
LCD 6 (E) to arduino pin 11
*/
LiquidCrystal lcd(12, 6, 11, 2, 3, 4, 5, 7, 8, 9, 10);

void setup()
{
   // Print a message to the LCD.
   lcd.print("hello, world!");
}
void loop()
{
}
As you can see it’s quite simple, if you want to get more details on the LiquidCrystal arduino library, then have a look here http://www.arduino.cc/en/Reference/LiquidCrystal
Now i mentioned earlier that four of the LCD pins were optional, this is because the LCD can be controlled using 4-Bit mode, this is also supported by the LiquidCrystal library and the code to do this is below, essentially the only change is to the constructor of the LiquidCrystal object.
#include <LiquidCrystal.h>

/* LiquidCrystal display with:
LCD 4 (RS) to arduino pin 12
LCD 5 (R/W) to arduino pin 6
LCD 6 (E) to arduino pin 11
*/
LiquidCrystal lcd(12, 6, 11,7, 8, 9, 10);

void setup()
{
  // Print a message to the LCD.
  lcd.print("hello, world!");
}

void loop()
{
}
Here are a couple of photos of the working LCD
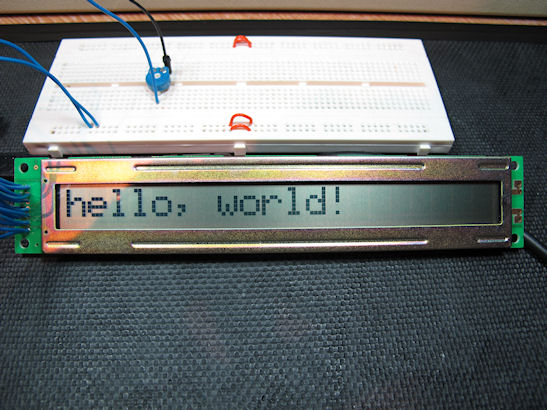
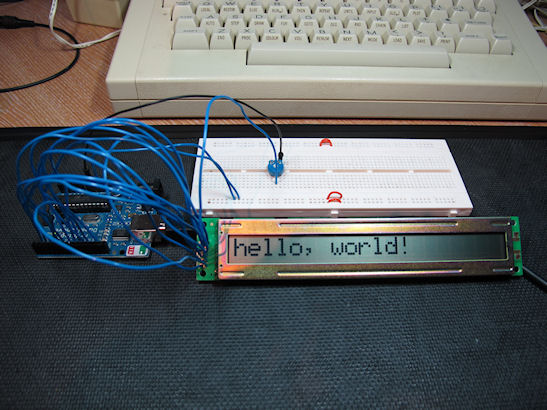
Yes that is an Acorn Electron in the background 🙂 part of a long term project of mine.
I hope this is useful to anyone else who may have got some of these LCD’s from ebay. (Sorry to the PIC or AVR people, especially the Assembler guys but you should be able to translate from the arduino code into whatever platform you are using).
Hi, has the LM038 lcd a LED backlight?
73 and tnx de ik6llj